
As you’ve maybe seen, my website doesn’t look the same. In this article, I will show you how to migrate from ghost to Hugo, ghost being a CMS and Hugo a framework to build static websites. As I want to make my website as fast and light as possible and I don’t modify my website really often, going for a static website was the best option.
CMS stands for content management system and can be thought as a software that helps you manage the content of your website. In general, CMSs generate dynamic sites : pages are generated on the fly when someone visits the website. Static site generators (SSG), on the other hand, are software that generates HTML code based on a template and a data source. The files are generated once and then wait to be served. CMSs being more user-friendly, SSGs offer more granularity but require more expertise.
1) Exporting data from ghost
Exporting data from ghost is really easy : go to the labs section in your ghost admin and click on “Export”. You’ll get a JSON file that contains all your posts from your ghost website.
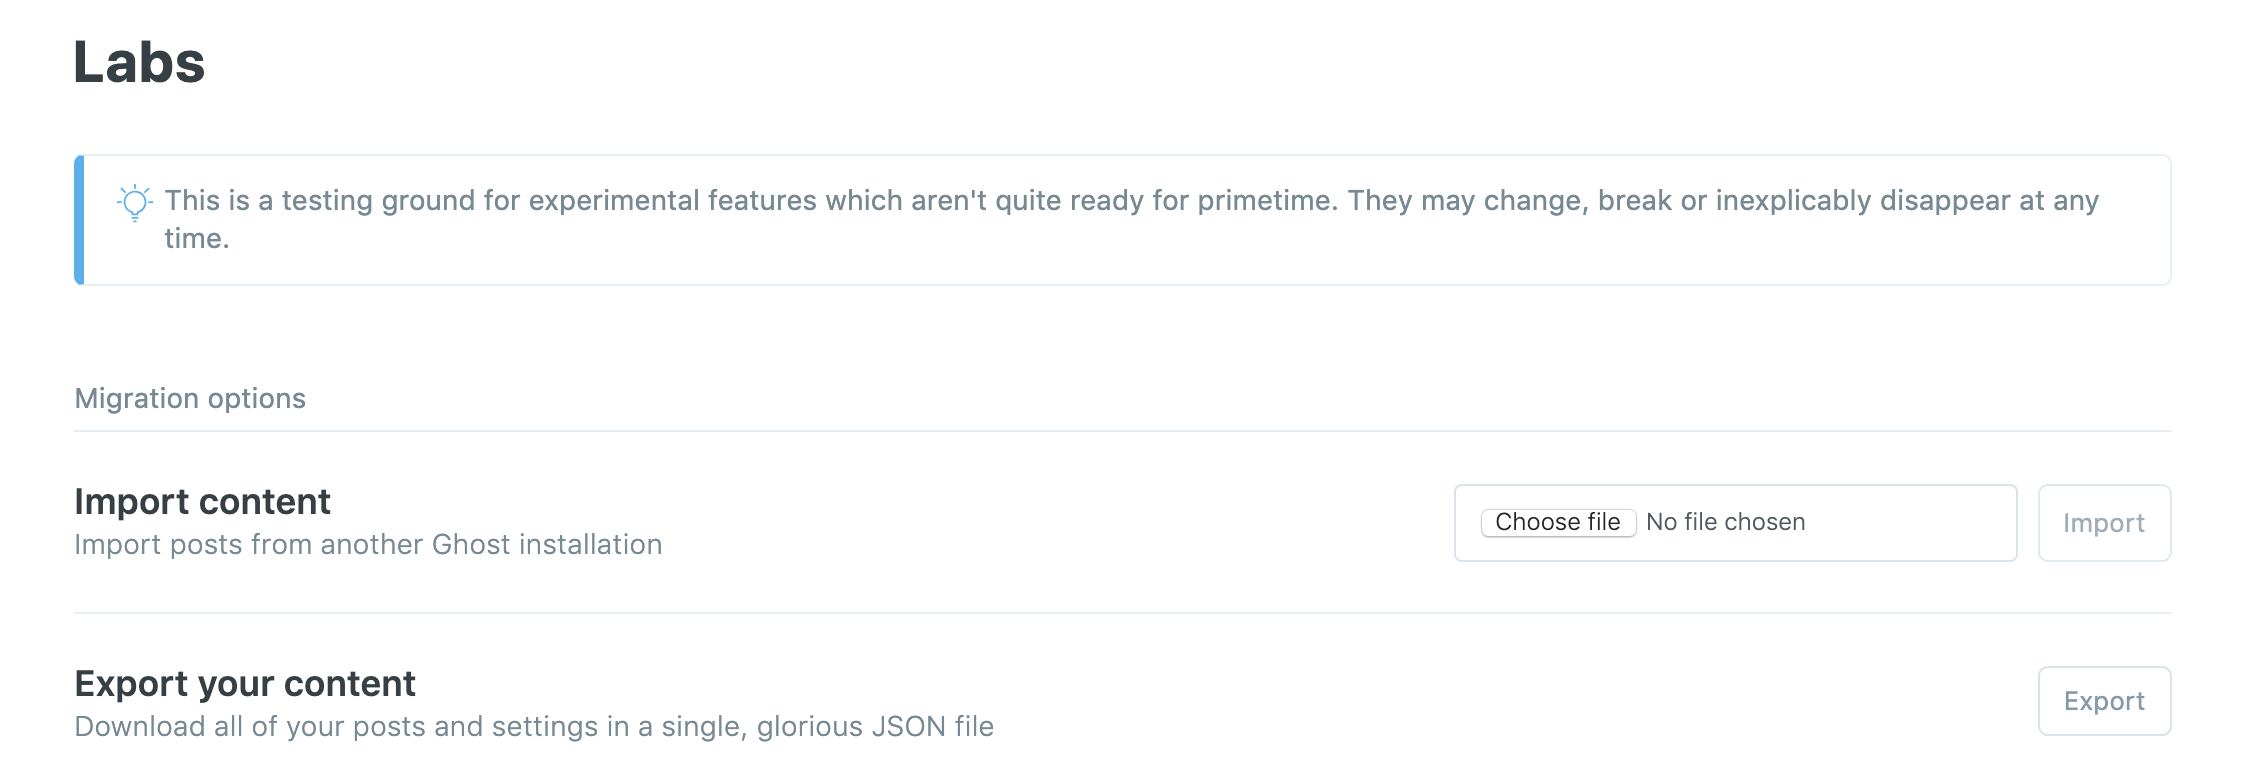
You will need next to download manually the pictures contained in your posts because it won’t be downloaded with the JSON file.
2) Using ghostToHugo to transform your JSON into a Hugo site
ghostToHugo is tool available on Github that is meant to convert an export from the ghost blogging engine into the Hugo engine. There are different ways of using it but the easiest way I found was to download the Pre-Built Binaries (for macOS, Linux or Windows) on the releases page and then extract the zip somewhere.
The next step is to launch ghostToHugo in the terminal : just go to the folder where you extracted the zip and then just type ./ghostToHugo:
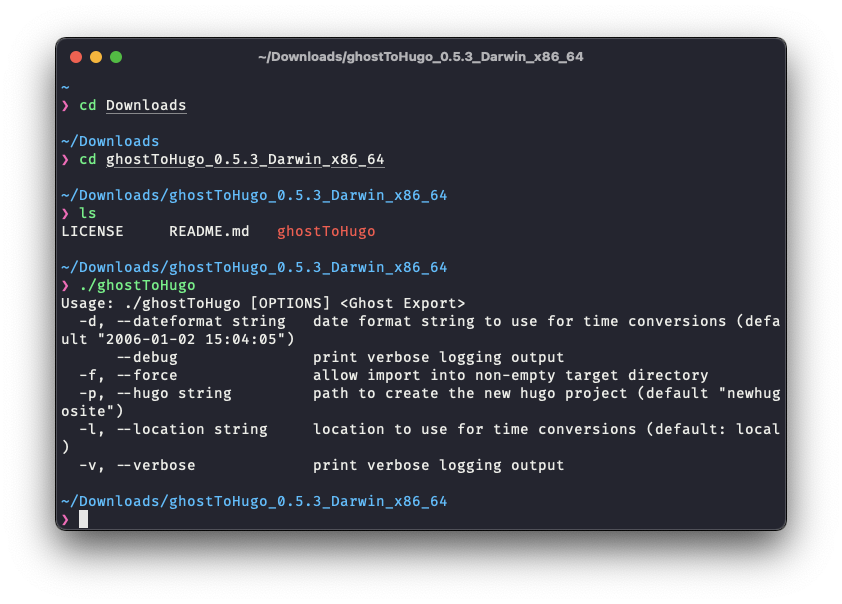
You’ll see the various options you can use but the simplest is to just call ghostToHugo with the path to the JSON file from ghost. You can also define the folder in which you want your Hugo site to be build.
./ghostToHugo --hugo ~/dendievel.me /Users/hugo/Downloads/hugo-dendievel.ghost.2021-04-11-15-05-43.json
The first part ./ghostToHugo calls the tool, the second part –hugo ~/dendievel.me defines the folder and the last part is the path to the JSON file.
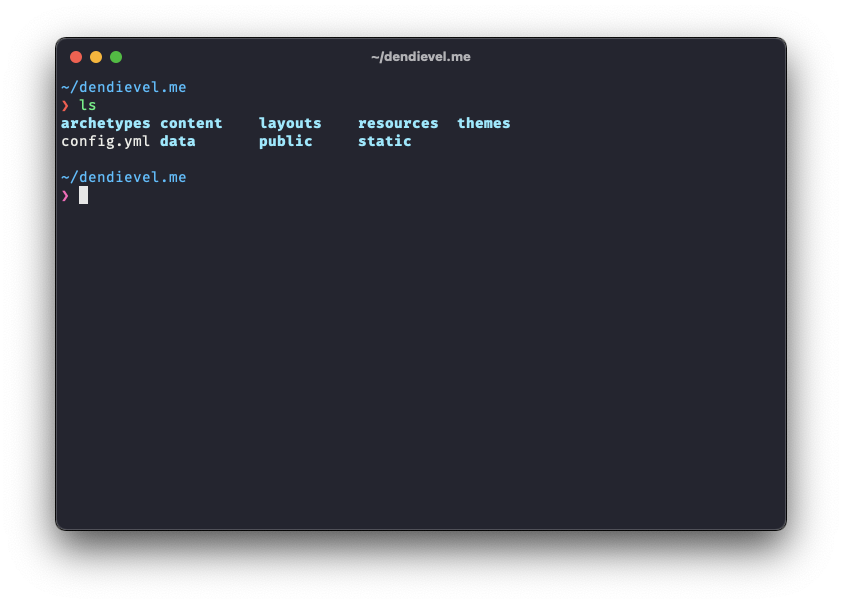
You will finally get your folder with some files in it, that’s your website converted to Hugo:
3) Install Hugo on your computer to modify your website
Now that you got a folder with all the components inside that make up a website, you still need to install the Hugo framework to work with it. It’s fairly easy and I let you check that here on the official website.
4) Configuring your website
Once you got your website converted to Hugo, you can forget your ghost admin panel because all the configuration will be done in the files inside your folder. The first important file you’ll find is the config.toml: it’s where you configure all parameters such as the title, the base url, the theme but also the menu or the privacy options. The TOML format is not my favourite so I switched to YAML because Hugo supports it too so here is my config.yml:
baseURL: "https://dendievel.me/"
title: hugo's blog
theme: PaperMod

params:
    env: production
    DateFormat: "2 January 2006"
    hideSummary: false

    defaultTheme: dark
    disableThemeToggle: true

    ShowReadingTime: true
    ShowBreadCrumbs: true
    ShowPostNavLinks: true

    profileMode:
        enabled: true
        title: Hi! I'm Hugo Dendievel
        imageUrl: "images/photo.jpg"

        buttons:
        - name: About me
          url: "about-me/"
        - name: My gear
          url: "my-gear/"

    socialIcons:
        - name: "linkedin"
          url: "https://www.linkedin.com/in/hugo-dendievel-627705174/"
        - name: "email"
          url: "mailto:hugo@dendievel.me"
        - name: "twitter"
          url: "https://twitter.com/hugodendievel"
        - name: "instagram"
          url: "https://instagram.com/hugodendievel"

    fuseOpts:
        isCaseSensitive: false
        shouldSort: true
        location: 0
        distance: 1000
        threshold: 0.4
        minMatchCharLength: 0
        keys: ["title", "permalink", "summary", "content"]

    assets:
        favicon: "/images/favicon.png"

pluralizelisttitles: false

outputs:
    home:
        - HTML
        - RSS
        - JSON

menu:
    main:
    - identifier: Abstract
      name: Abstract
      url: /abstract/
      weight: 10
    - identifier: Canada
      name: Canada
      url: /canada/
      weight: 20
    - identifier: Code
      name: Code
      url: /code/
      weight: 30
    - identifier: Instagram
      name: Instagram
      url: /instagram/
      weight: 40
    - identifier: Search
      name: Search
      url: /search/
      weight: 50

privacy:
  disqus:
    disable: true
  googleAnalytics:
    disable: true
  instagram:
    disable: true
  twitter:
    disable: true
  vimeo:
    disable: true
  youtube:
    disable: true
This is an example of what should look your config file when your website is done but the default file is quite empty in comparison. This file is just to help you configure yours but you shouldn’t use this configuration file without modifying it to your needs.
Then there is also some folders you will interact with: the folder static contains all your static files such as your photos, the content folder contains all your posts and the theme folder is where you put the theme you use on your website.
static folder
This folder contains your static content such as photos, but also files that you would like to share on your website like a CV. You should organize it with folders because it can become really fuzzy when you got a lot of files.
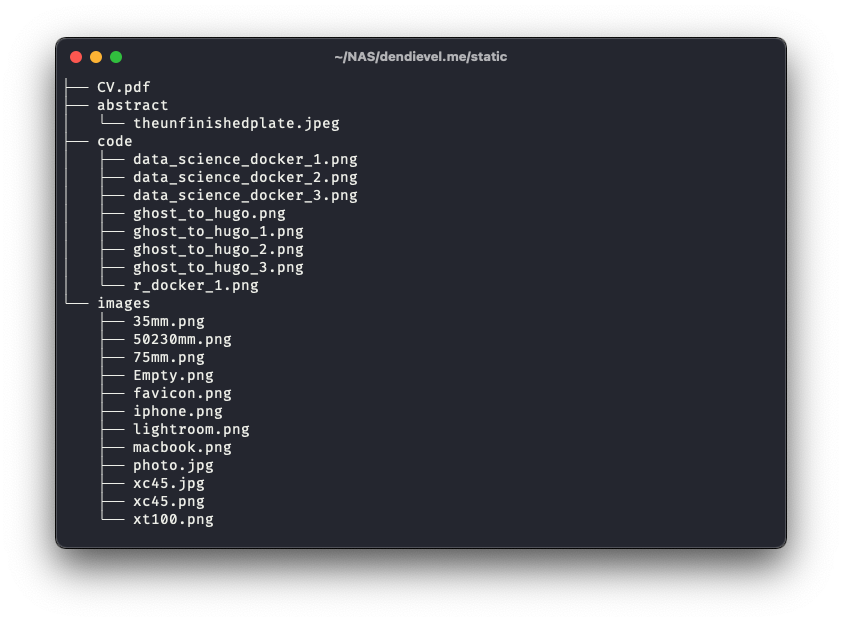
Note that when you link a file inside a post, the framework consider it to be inside the static folder, so you don’t need to write the full path, just the path inside the static folder. Example in Markdown :

content folder
The content folder is where you’ll put all your posts and should already be filled with the posts from ghost. You could nevertheless organize it as you like:
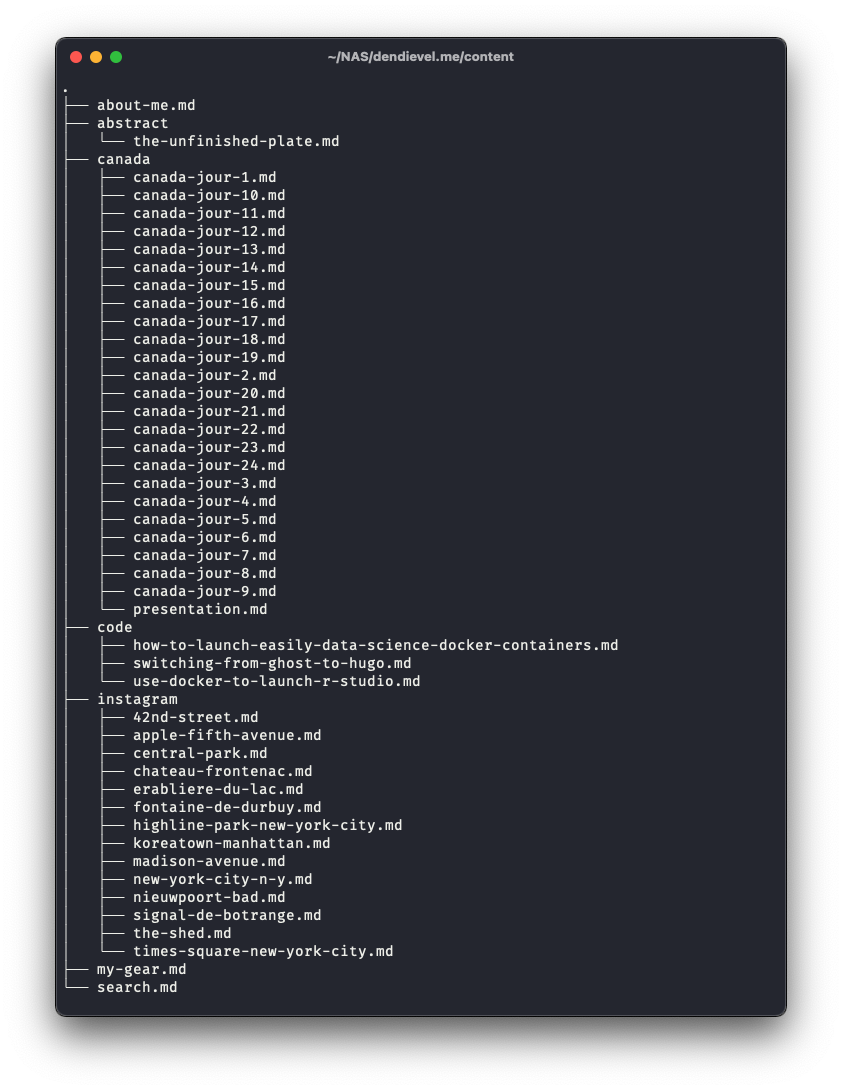
Note that the folders inside this folder organize the way the posts will be classed on your website. You can see in my config.yml that the url to my “Code” menu is “/code/” and thus all the files inside the folder “code” will be set in this category.
theme folder
There are a lot of themes on internet, just use Google to find one. I personnaly use Papermod but there are plenty different styles. You just have to put it inside your folder and it will be recognized as long as you mention it in the config file.
4) Running your website for the first time
Thanks to Hugo installed on your computer, you can easily make your website accessible in local to see it and modify it to your needs before publishing it on the net. You’ll need to be inside your folder then type the following command in your terminal:
hugo server
It will automatically start a local version of your website that changes dynamically (funny for a static website though) the content displayed when you modify your files:
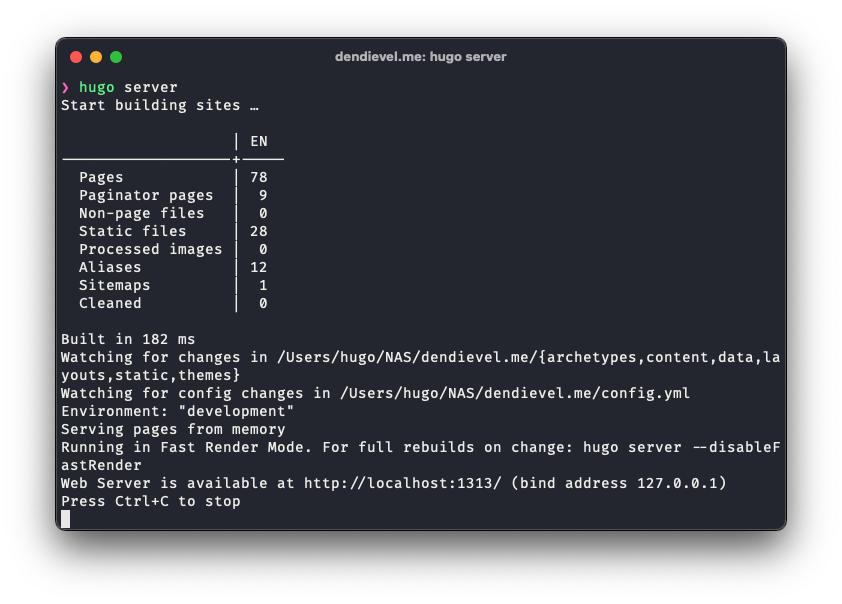
Your website is now accessible at http://localhost:1313.
5) Writing your first post with Hugo and modifying your website to your needs
Now that your website is running, you’ll see that even if the transition has been made to Hugo, a lot of things need to be changed before your website look like the one you had with ghost. I’m still personally discovering some settings as I speak but the community is great and you’ll easily find all the answers to your questions on internet.
However, you may be wondering how to create a new post. It’s actually quite simple. Go back inside your folder and type:
hugo new posts/my-first-post.md
‘posts’ represents a folder inside the content folder and my-first-post.md is your post in Markdown format.
All you need to do is write your post, set the category, title and other parameters of your post like any Markdown post and it will be locally available on http://localhost:1313/posts/my-first-post/.
6) Make it available on internet
Now that your website is ready to be served on internet, the last command (that may look short) you need is:
hugo
This command should be executed every time you’ve made changes to your site and the contents of the public folder should be transfered to the root of your web server.
This command, typed inside your folder, will generate all the necessary files (mostly html files) to serve it on the internet. Thoses files will be accessible in a new folder called “public”. The last step is to configure a web server (I personnaly use Nginx) to serve your content on the internet.
You now have everything you need to build your new website!
References: