Tired of installing tools and dependencies on your computer ? In this article I will show you how to create with Docker data science containers for fast and easy development.
1) What you need
- Docker installed: docker-desktop
- An editor : Visual Studio Code or whatever you prefer
- A folder within you will put every file we will create : let’s call it “Docker”
2) Files creation
1) Dockerfile
The first thing you want to do is define your Dockerfile, a file whitin which you define the base image to use in your Docker container beside some other parameters :
# Use tensorflow image with support for gpu and jupyter
FROM tensorflow/tensorflow:latest-gpu-jupyter

# Copy the requirements to the working directory
COPY Requirements.txt /tf

# Set the working directory to /tf (depends on the image)
WORKDIR /tf

#Update the packages database (linux command)
RUN apt-get update

#Upgrade pip, install the requirements and jupyterlab
RUN pip install --upgrade pip
RUN pip install -r Requirements.txt
RUN pip install jupyterlab
In this file, we define the image we will use : a tensorflow image with jupyter containing tools for data science. After that, we import our “Requirements.txt” file containing the packages we will use to develop. Finally we set our working directory and update and install some tools we will use whitin our container.
You just have to copy this into a new file called “Dockerfile” created with VSCode into our “Docker” folder.
2) Requirements
We will now create the “Requirements.txt” file into our folder. This will contain the dependencies we need to run some code :
pandas
scikit-learn
seaborn
spacy
scipy
statsmodels
tweepy
wordcloud
tqdm
tokenizers
python-louvain
nltk
networkx
matplotlib
numpy
beautifulsoup4
You can modify this to your preferences and then save it into your folder.
3) Docker-compose
It’s time to create your docker-compose file. This file will tell to docker how to create your container. We create one service called “data” that represents our tensorflow image. We first tell him that we want to build our container based on our files in the current directory (the “.”) and we precise the path to our Dockerfile (which is in the same folder).
version : "3.8"

services:
  data:
    build:
      context: .
      dockerfile: "Dockerfile"
    volumes:
      - /yourpath/Docker/files:/tf
      - /yourpath/Docker/files/model:/tf/model
      - /yourpath/Docker/files/data:/tf/data
    ports:
      - 8888:8888
    env_file:
      - dev.env
You should also precise your volumes : it points the folders inside your container to folders onto you computer. This allows to save the data and reuse it after you shut down your container. If you don’t do this, you will loose everything every time you shut down your container! In this example, I define 3 folders : one main folder that points to the working directory /tf and two other folders to save the models and the data separately for better organization.
Note: you should replace “/yourpath/” with the path to your “Docker” folder
After we precise the ports we want to point outside of the container. We will use jupyter that uses the 8888 port so we forward that port outside the container. If you want to user another port outside the container you can change the first port adresse : 10000:8888 will forward jupyterlab to the 10000 port on your computer.
Finally we can set the path to an environment file that will contain some environment variables (we’ll see that after).
When this file is adjusted to your preferences, you can save it under the “docker-compose.yml” name.
4) Environment file
Like said before, we create a file called “dev.env” that will contain some environment variables. In our case we will set two variables:
JUPYTER_ENABLE_LAB=yes
JUPYTER_TOKEN="token"
The first enable jupyterlab because it’s not enabled by default. The second variable sets a personalized token to use jupyter. This way it’s not necessary to look into the logs to get the token to connect to jupyter.
5) Makefile
This last file is not necessary but allows to make shortcuts of some docker commands. It’s way easier to manage your container with this file.
Note : you should have “make” installed onto your computer. It’s easy and probably preinstalled on macOS and Linux but you should have to do some manipulations to make it work on Windows.
Anyway, if you don’t use the makefile, you just have to use the full commands and not the shortcuts presented in this file:
build:
	docker-compose build
stop:
	docker-compose down
run:
	docker-compose up -d
logs:
	docker-compose logs data
interactive_run:
	docker-compose run data bash
interactive_exec:
	docker-compose exec data bash
clean:
	docker image prune -f
You just have to save this file with “Makefile” as name and put it in our folder with the other files.
3) Launch the container and access to jupyter
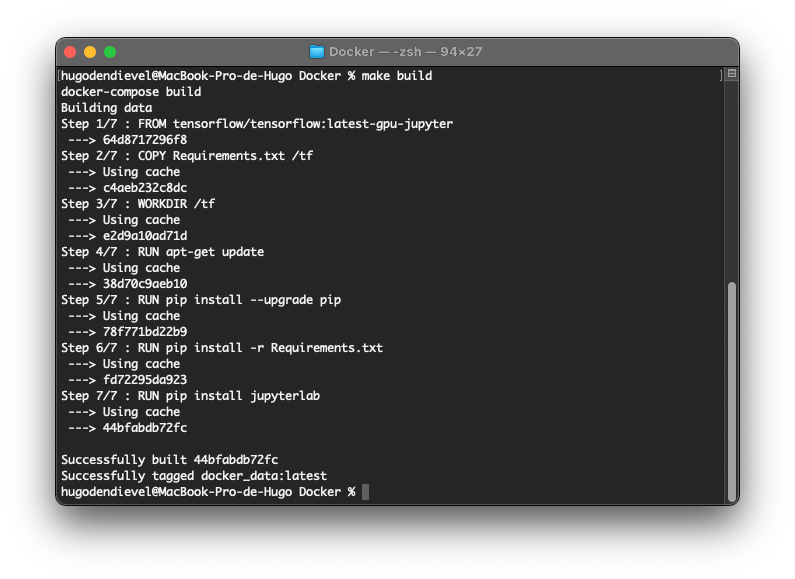
When you have those files in a folder, the only thing you have to do is to open a terminal window, go inside the folder “Docker” and build it with “make build” (or “docker-compose build” if you don’t have make). This will take some time the first time because it needs to download everything :

The image is now build with our parameters and requirements and we can launch it with “make run” (or “docker-compose up -d”) :

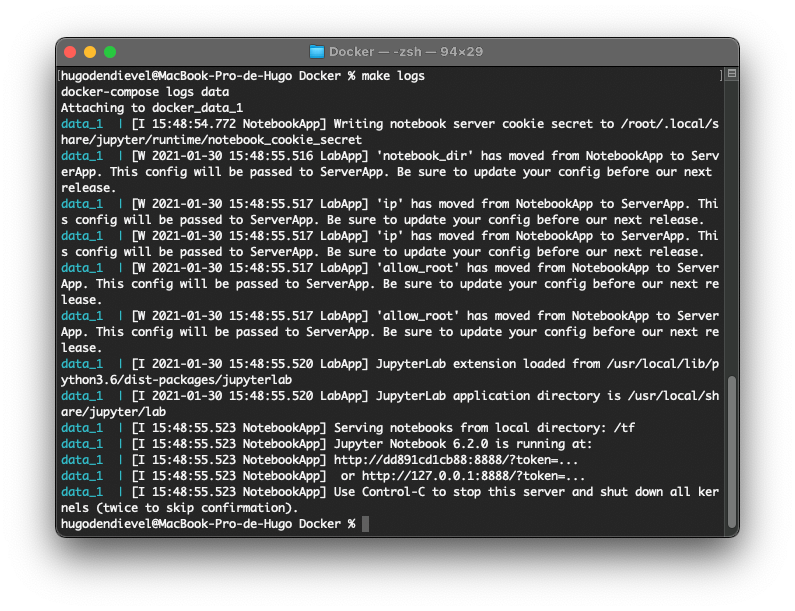
The container is now up and ready to use ! If you need to access the logs you can use the “make logs” command (or “docker-compose logs data) :

Jupyterlab is now accessible at: http://localhost:8888/lab. You can pass the token in the url to connect directly to jupyter : http://localhost:8888/lab?token=token with the last “token” the token you defined earlier.
To shut it down, you just have to use the “make stop” command (or “docker-compose down”) and the container will be stopped and removed. Everything you’ve done into the container (e.g. installing something) will be lost, it’s why we use volumes to save data and why you should modify the files that define your Docker image/container to launch directly your container with the tools you need in it : that will save you from reinstalling everything every time your re-launch your container.
References:
Thanks to Jonathan who made me discover and teached me how to use Docker.